
Bitfinex Setup and Creating an API Key
Contents
1. Deposit Funds into Your Bitfinex Account
Follow Bitfinex’s on-screen guidance to complete the items below so everything works later
-
Register a Bitfinex account
-
KYC: complete at least Intermediate verification to get full crypto trading and transfer access; to use international bank wire (SWIFT), you must verify to the highest level (Advanced)
- Basic requires: a government-issued photo ID, a selfie, a phone number and your residential address
- Intermediate requires: everything in Basic, plus a second government-issued photo ID, proof of residence, a financial questionnaire and a KYC declaration
- Advanced requires: everything in Intermediate, plus a bank statement
-
Two-factor authentication: we recommend
Twilio Authy Authenticator, which makes it easy to switch phones later (you can link a phone number or email, but be sure to remember your password)- Authy (Android): Google Play
- Authy (iOS): App Store
-
Deposit: transfer USDT to the platform over a blockchain (Ethereum, Tron), or use international bank wire (SWIFT)
2. Create a Dedicated Key for the Platform
New Interface (after 2026-10-14)
Step 1: Create a New API Key
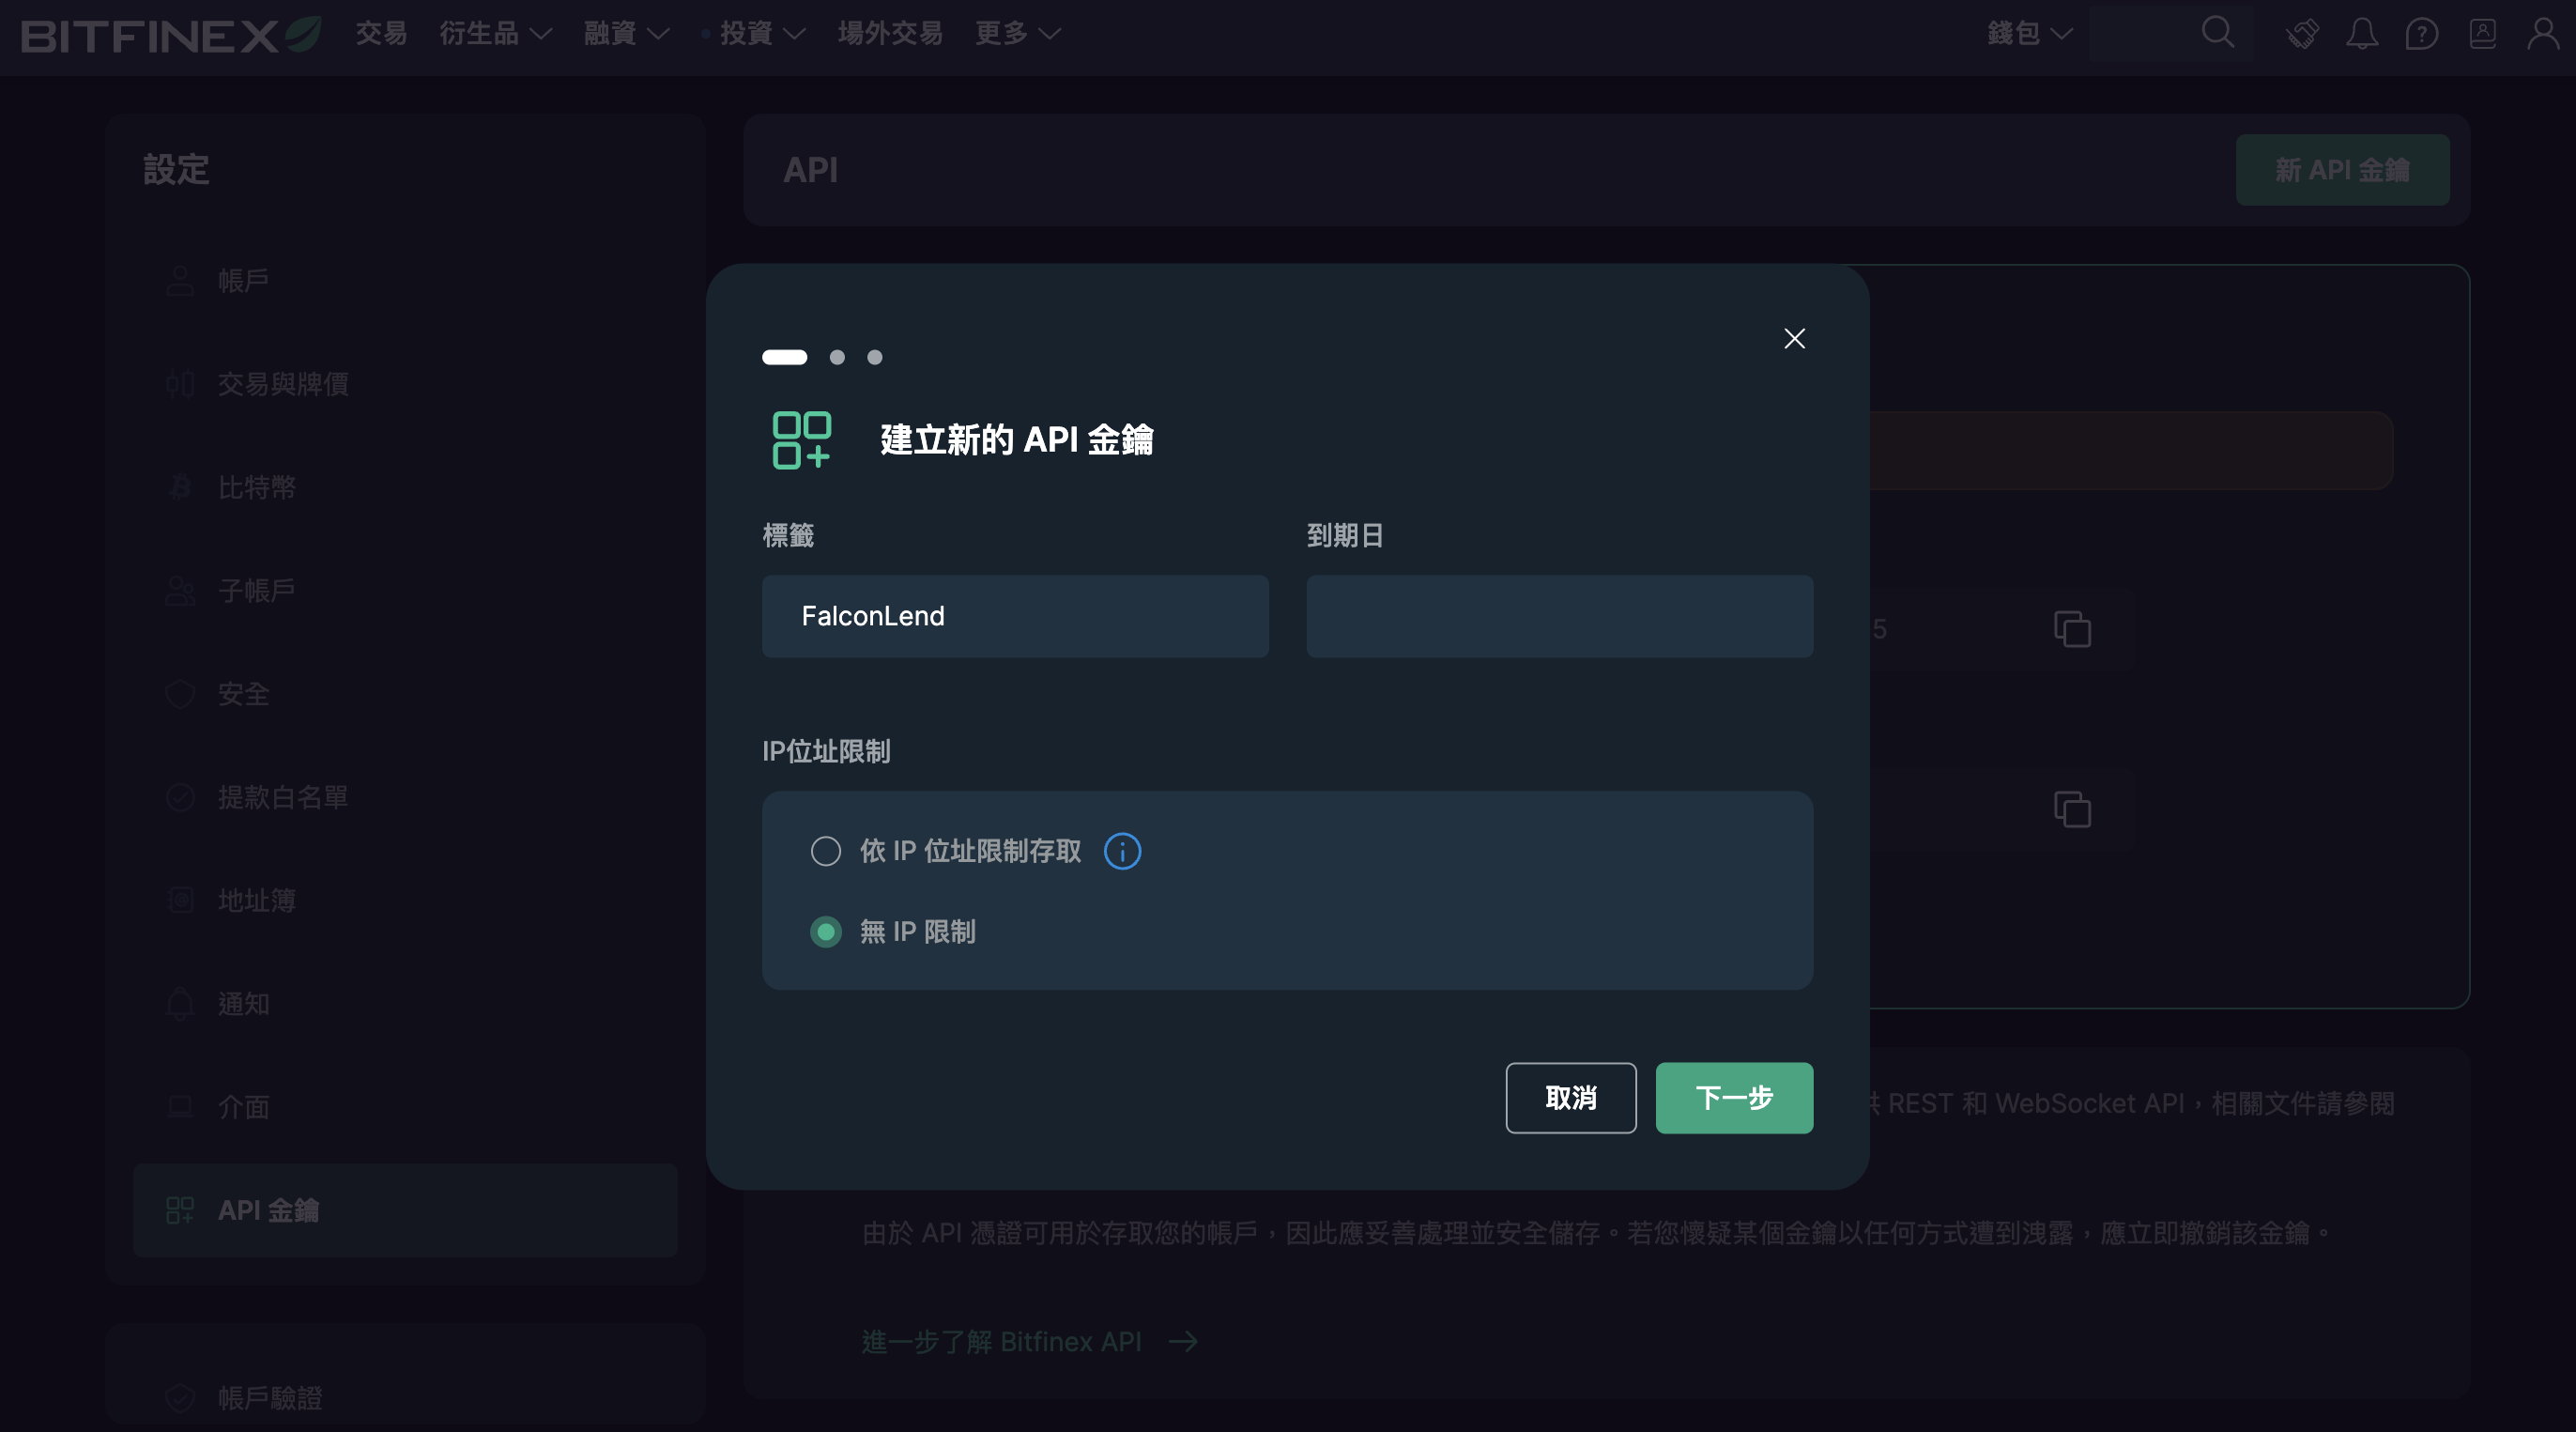
- Click the icon at the top right of Bitfinex > API Keys > New API Key
- Label:
FalconLend - IP address restriction: no IP restriction
- Label:
Step 2: Set Read Permissions
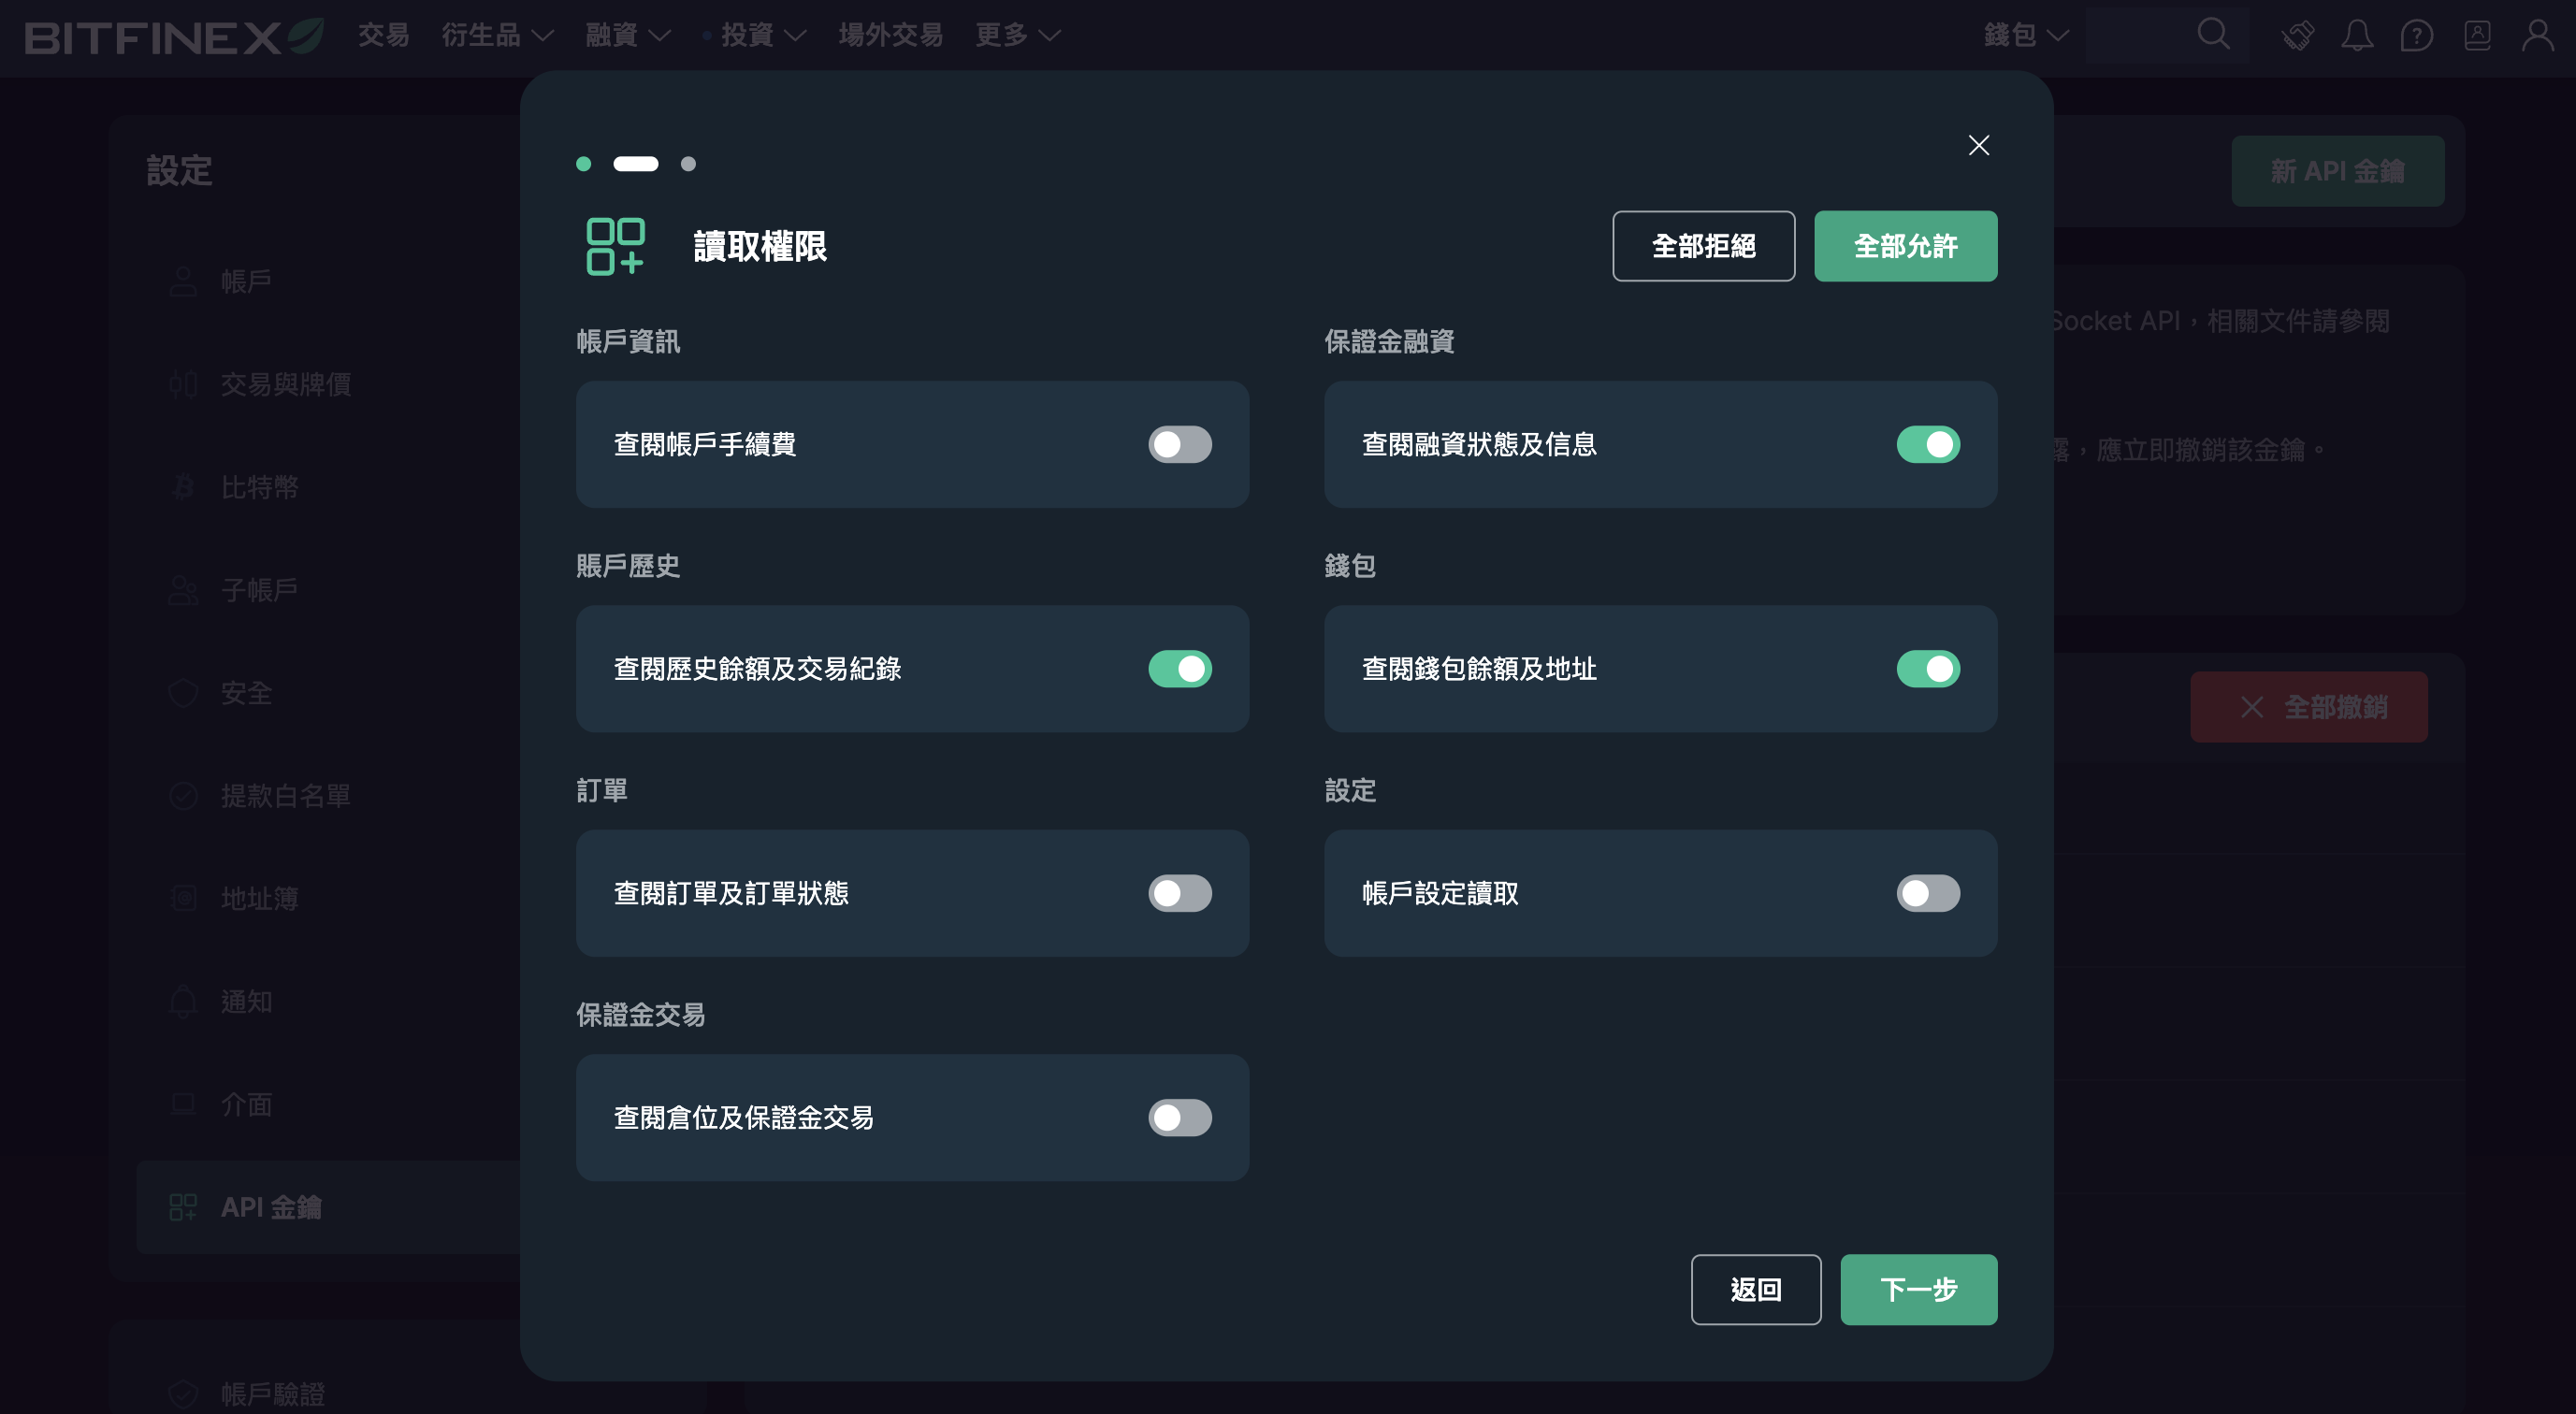
- Get funding statuses and info
- Get historical balances and trade info
- Get wallet balances and addresses
Step 3: Edit Permissions
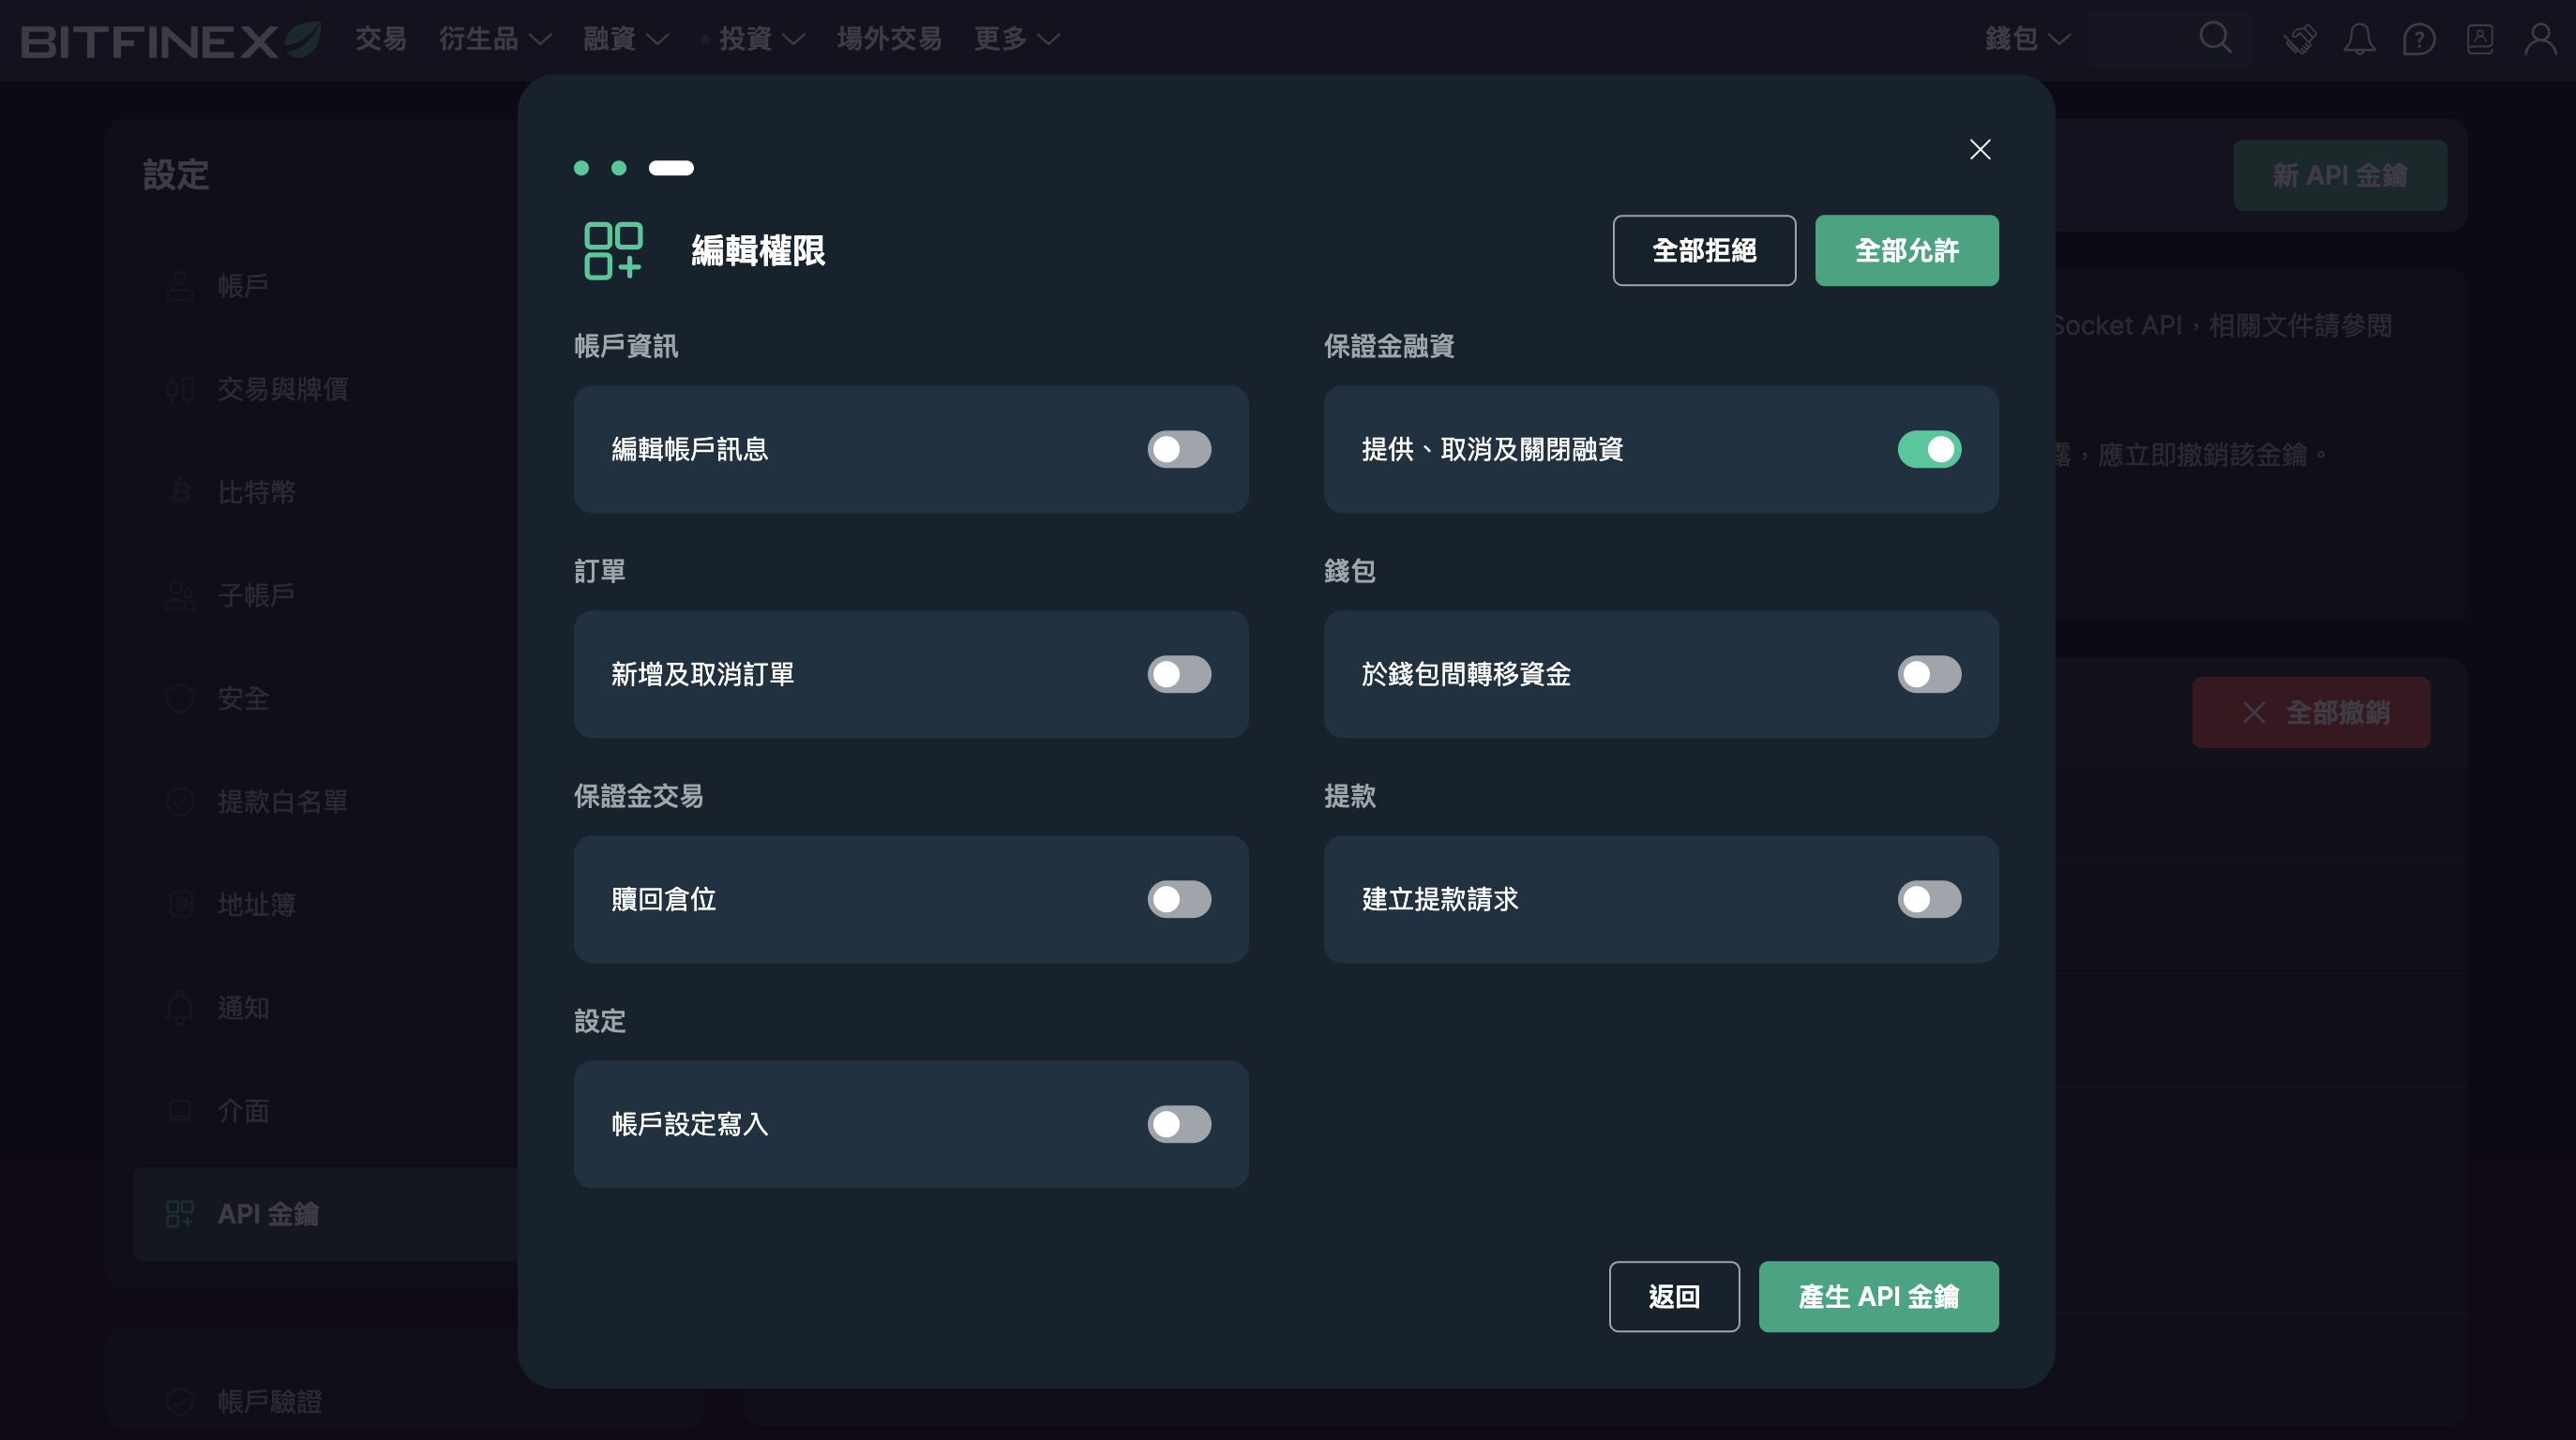
- Margin Funding: offer, cancel and close funding
- After creating the key, go to your email and click the Create API Key button in the message
Step 4: Get the API Key and Secret
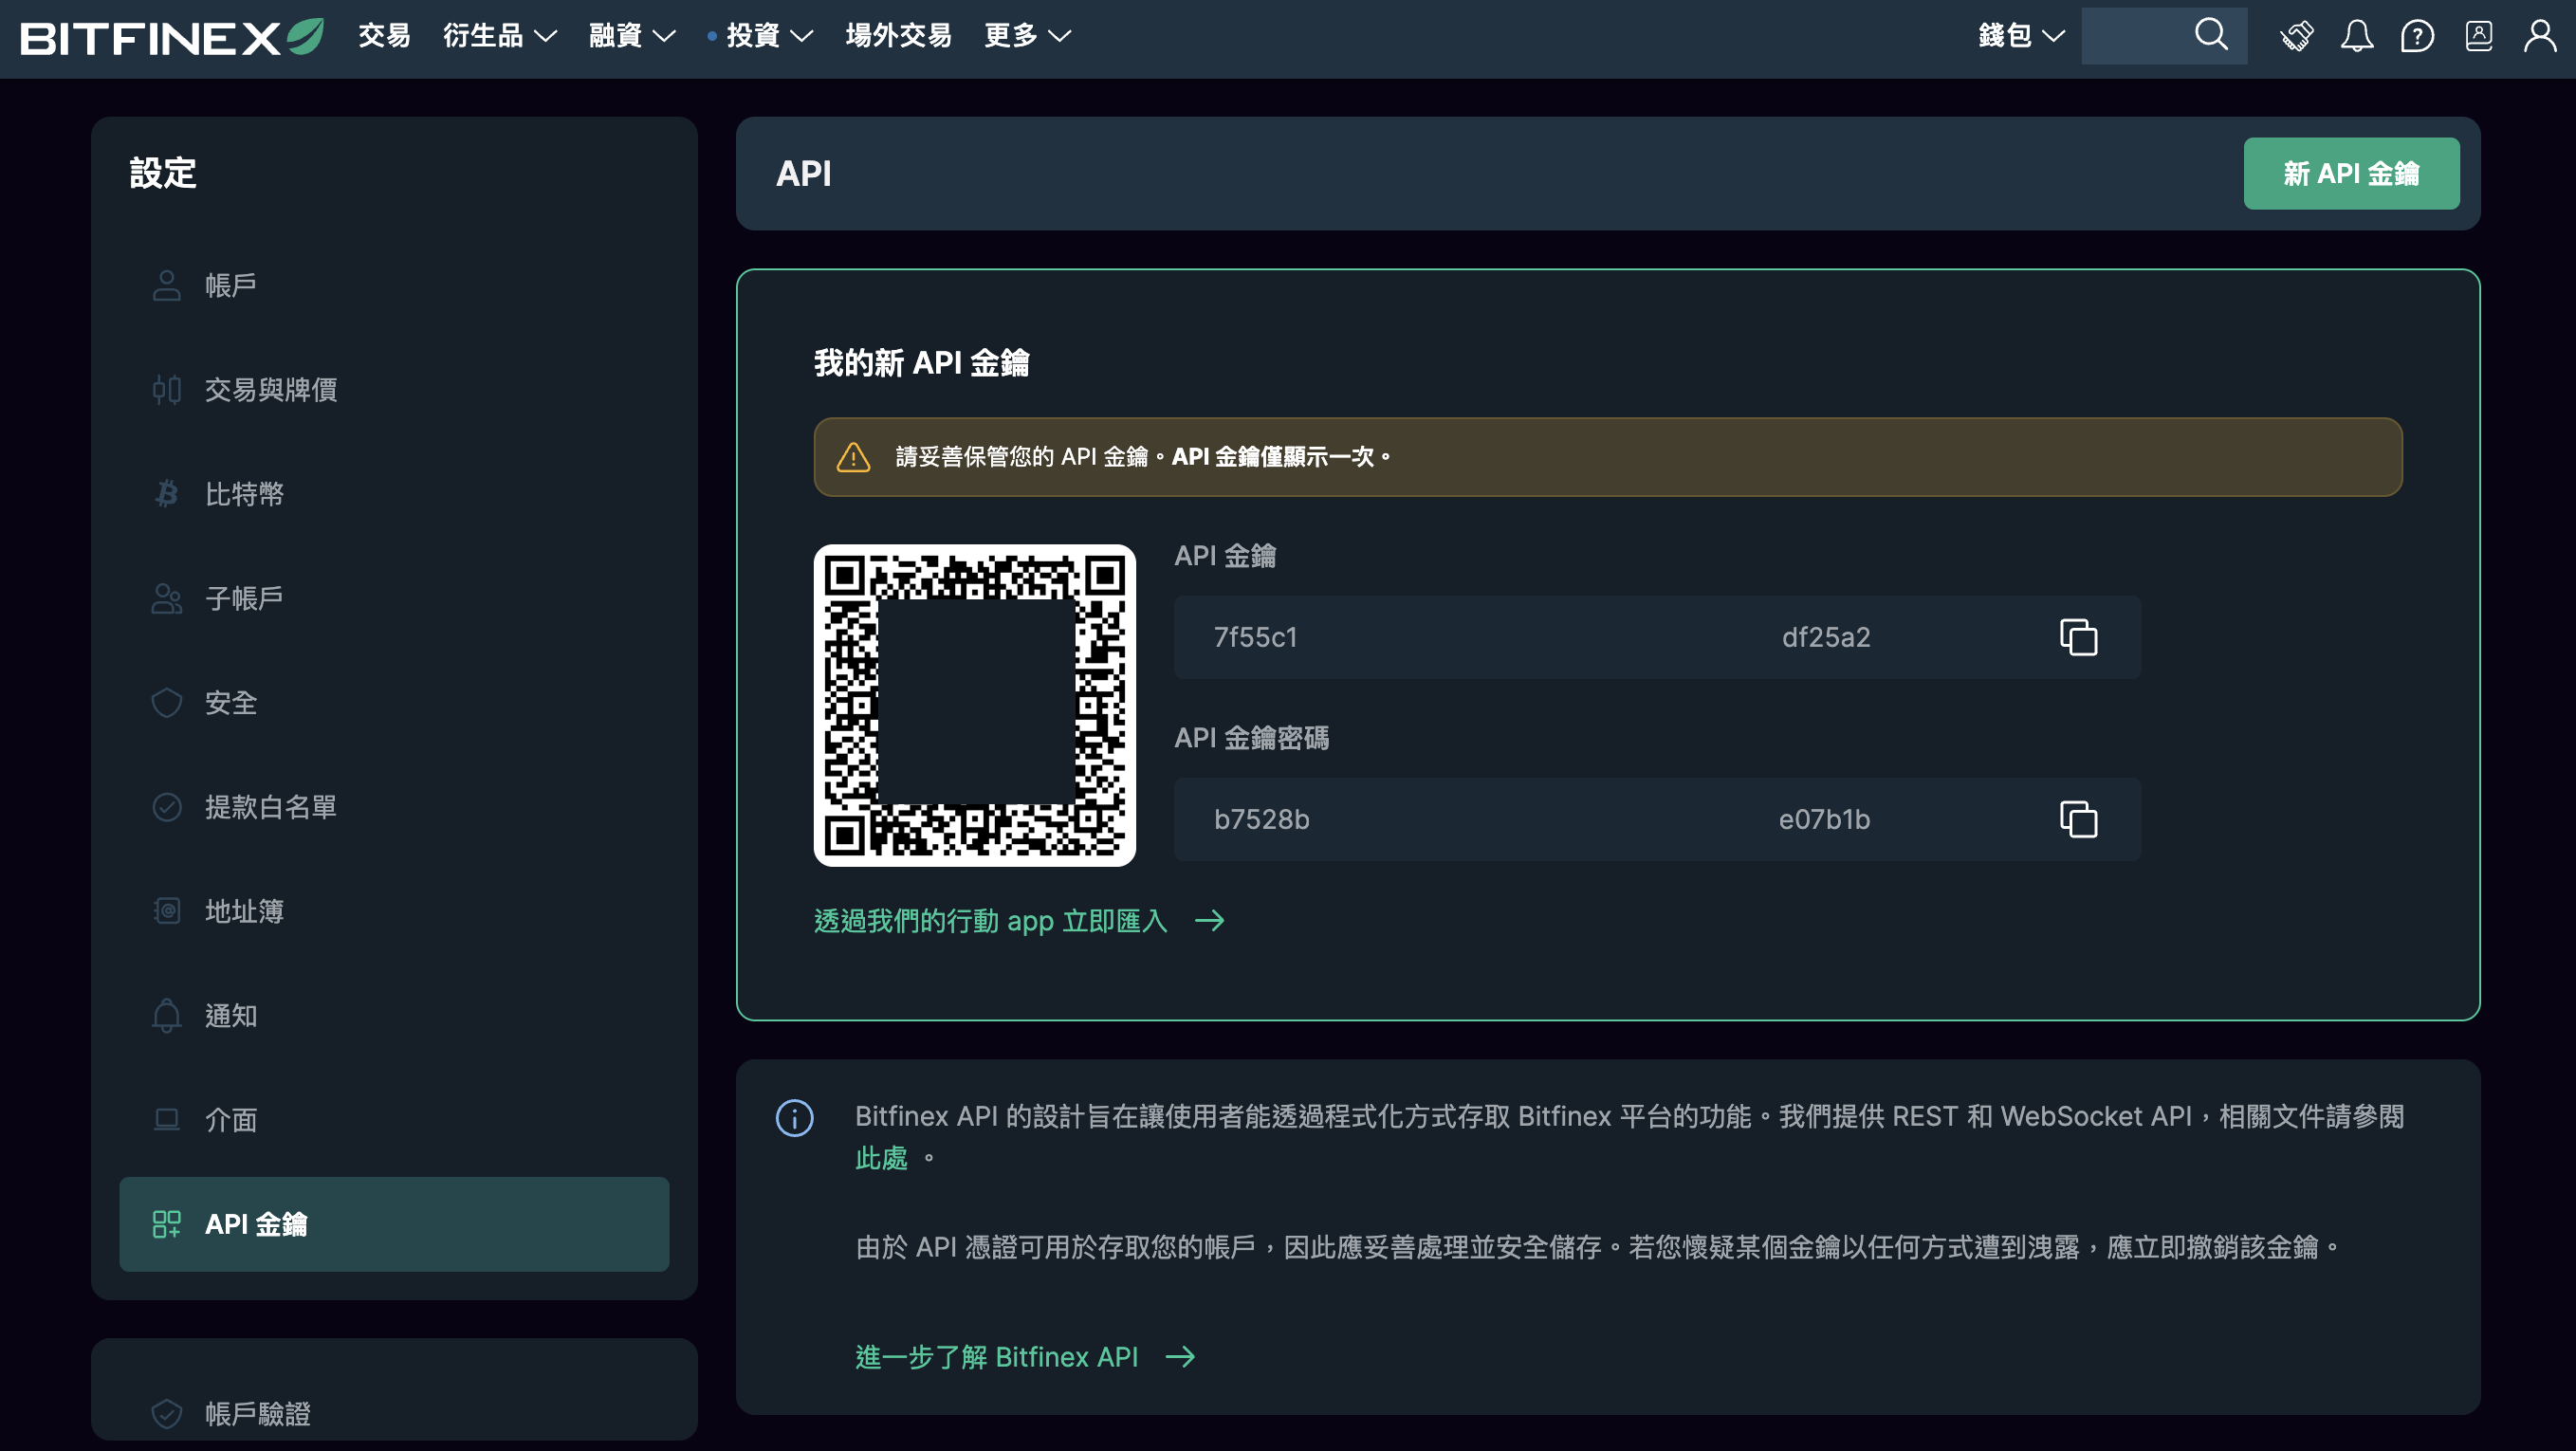
API KeyandAPI Secret- Each is 43 characters (lowercase letters and digits)
- Record them safely, then enter them in FalconLend
- The key is shown only once and disappears when you close the window; if you lose it, delete the old key and create a new one
- When done, continue to Set Up FalconLend Auto-Lending
References
Related